🔨 Phase One: Demolition
- Teddy Travels
- May 6, 2024
- 4 min read

Updated: Jun 19, 2024

💚 Thanks for stopping in! Living in the bus full time was a dream and a goal for so long. The road forward was a bit uncertain but it wasn’t as bumpy as some of the roads we’ve been driving recently 😆 In the demo phase, we got a big dose of reality as we realized this was not going to be as easy as we had hoped.
Bus 0271
At this point, we were just getting to know our bus. Having picked him up from Tennessee, we had about a two hour drive to get to know him (or her, we didn’t know yet!) In the next few days we tried to take a test drive so I (Mara) could get my feet wet.
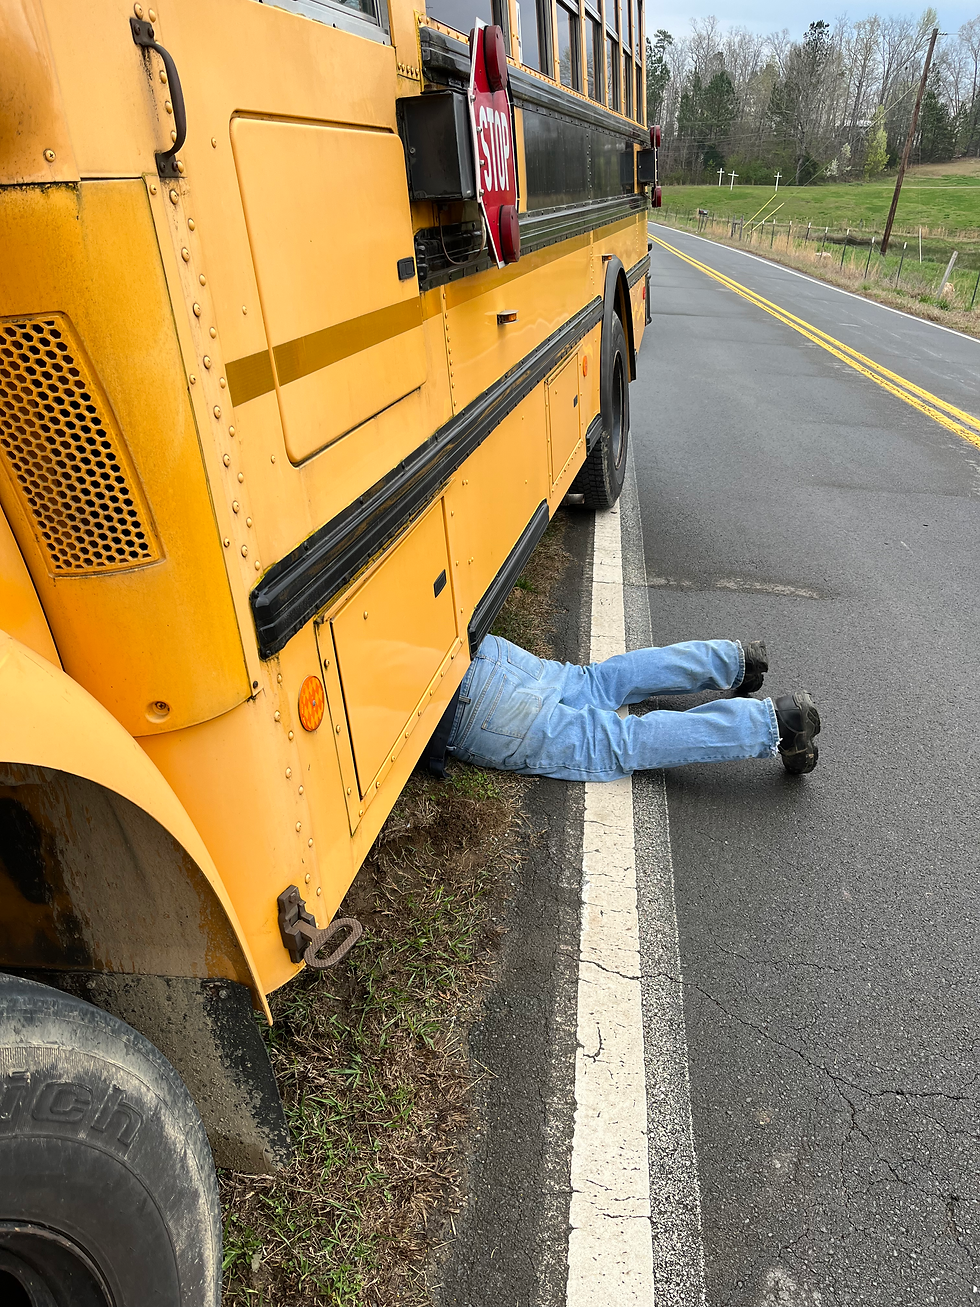
We made it down the driveway before we realized the gas pedal was unresponsive. It took a huge tractor to pull us back up the hill, and we found a wire that had been chewed by a mouse. 😩😩 (a $300 fix for a pedal sensor😥)
Otherwise, our bus was silent and a bit sassy to start. (I firmly believe most large equipment have personalities and thus names. It took my car 6 years to finally tell me her name was Harriet, on the day I was selling her.) Names would pop in our head but just wouldn’t stick, didn’t feel right. It took some time but he came around.
Day 1-3: Hit the Ground Running


Name or no, we had a deadline to hit and a lot to do. Thankfully the previous owner had already removed the bus seats, saving us a ton of work. He had also already cut the lines to the diesel heater, effectively taking that decision out of our hands. Coming from Maryland, the bus had 3 heating units - one by the driver, one over the stairs, and another toward the middle section.
We started by cleaning up and emptying as much as possible. The previous guy had already cut floor pieces, bought studs, and flooring that he included so all that had to come out. We knew we wanted to insulate the bus as best possible so that meant everything had to be stripped back to the most exterior layer. I got started removing screw after screw after screw… each ceiling panel had at least 75 screws, the walls, everything had screws 😅 Brandon got busy grinding out the screws that were stripped. Soon, he was grinding the metal walls off, panel by panel. Each section had bits of older fluffy insulation that we pulled out.
Day 4-18: Stubbornness Has Kicked In

A lot of this build hinged on our stubbornness, our resilience, our unwillingness to quit. Our first real test of pushing through the “difficult” came much sooner than I would’ve thought. We had no experience going into this. I had worked on various, much smaller, building projects with my Dad and Papa when I was a child and occasionally my crafting would take me to a piece of furniture. Brandon claims he “couldn’t hang a picture before this”. Needless to say, we were amateurs.
Getting through this demo phase when from the outside it looked like was almost done was so difficult. Progress was visually minimal. It took what felt like forever to get all of the screws out. I ended up with a full bucket. After all that grinding, we thought the ceiling would come down easier with gravity. Wrong. We had to use a prybar to leverage the ceiling panels away from the roof. They were also surprisingly heavy but thankfully they folded fairly nicely into the back of our truck, Bert.

And on the 5th day, the Stop signs were removed 🛑❌

Mara had a job out of town so Brandon took advantage of the time and grinded the entire floor, cleaning off rust, debris, and bits of old flooring. I can’t imagine how monotonous or difficult that was but it helped us get so much closer to laying our floor. 💪🏼
By the 18th day, I had been wrestling with the heaters off and on for long enough that I was fed up. I had had to make sure the freon hoses were reconnected, cut a diesel line, and remove heavy, rusty metal pieces.


This driver side piece needed almost all of its screws grinded out.


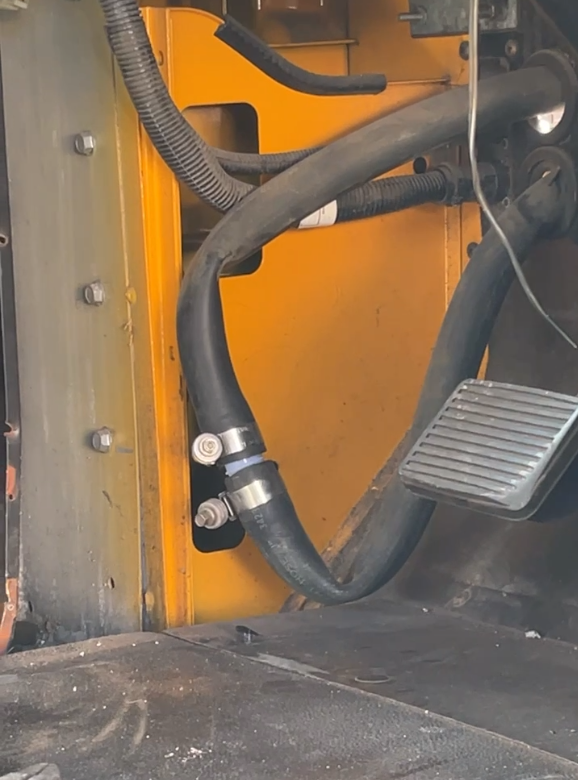
Pictured: stair heater, driver side freon hoses (this was moved into the engine at a later step), and the passenger side freon hoses inside the engine.
Finally, I got both the driver’s side and stair side heaters removed. We had tackled the center heater a few days before. The space that opened up made the effort well worth it.

Even now, we aren’t completed with the build. The plan is for a cabinet for our air fryer, some shoe cubbies, a trash can, and some storage to fit where the stair heater used to be.
Thank you for joining us on this journey of a lifetime. We hope our blog inspires you to embrace your own spirit of adventure and discover purpose in everything you do.
Until next time, happy trails!


Comments