🔨Phase 4: Rust Protection
- Teddy Travels
- Jun 24, 2024
- 2 min read


Welcome to our blog! 🤩 Mara and Brandon here 💚 I knew condensation would be a challenge during our bus build, so we made sure to tackle it head-on. 💧🚌 We spent hours ensuring the metal interior and exterior is water-tight.
🔑 Preparation is Key
After the window deletes were installed, we had a short window to protect them from rust before the weather would take its toll. A quick all over pressure wash got the outside ready for the protective paint. I also spent time on the inside wiping down walls and prepping the windows for the incoming paint.

📅 Day 22 - April 16 2:14pm - 4:10pm
Brandon worked the pressure washer around the outside of the bus to make sure all dirt and grime was off before painting. To ensure the roof got the best protection, we chose a paint meant for water, knowing its water resistance would be exactly what we were looking for.
In the sun, the bus dried quickly so we took advantage of the rest of the day and Brandon painted the roof’s first coat of paint. With a 24 hour cure period, we were thankful it did not rain.
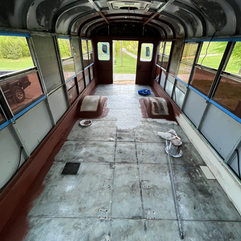
📅 Day 24 - April 18 5:04pm - 11:10pm
Starting with an empty bus, swept and mopped, windows prepped with blue tape, and a newly reinforced floor, Mara got to work on the inside. I started with a brush going around corners and ledges. Let me tell you…this was not the way😂 Progress was ssoooo slowww and I ended up using a brush in more areas than I actually needed to. I was thankfully saved by Brandon who is a much better painter than I am (he also had a roller and long pole instead of a 3 inch brush👀) He came in around 10:50pm and had the ENTIRE inside painted by 11:10pm… that’s 20 mins compared to my HOURS of covering the little joints and small places 😮😮


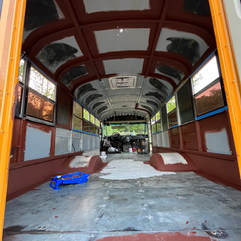

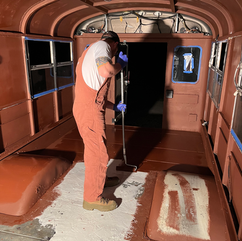


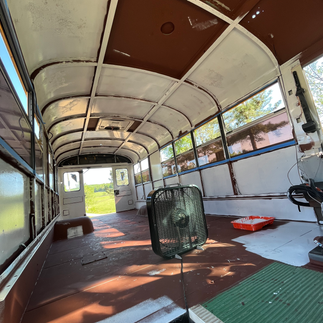
📅 Day 25 - April 19 3:41pm - 8pm
The change of having the bus all one color on the inside was kinda crazy but somehow the transition to the white enamel was even more startling. I do love a blank canvas tho 😍. I started a little earlier and started with the roller and pole this time… 2 hours later and I was still not completely finished with the big parts and I still would need to go behind and get the small spaces. Thankfully Brandon came in again after work to help me. He took on the rest of the big spots and I tackled the small stuff. We finalized our job with our hand prints, Duke’s paw print, and the bus’s name: Teddy.


🚎 Theodore aka Teddy
Sometime between demo and fixing the floor, our bus’s personality was finally showing and a name struck us both: Theodore. He loves bugs and is a little shy at first. Teddy came quickly after and somehow we knew it was his name.
📝 Materials
White Marine Enamel: https://www.homedepot.com/p/Duralux-Marine-Paint-1-gal-White-Marine-Enamel-M720-1/205113618
Thank you for joining us on this journey of a lifetime. We hope our blog inspires you to embrace your own spirit of adventure and discover purpose in everything you do.
Until next time, happy trails!


Comments